

Overview of How To Lay Block Paving
In this guide, we’ll provide a detailed overview of how to lay block paving, from preparation to application and finishing touches.
All block paving and cobble setts are a widely favored form of paving that is commonly used for driveways, patios and pathways enhancing the looks and functionality your outdoor space. It comprises individual blocks or bricks that are carefully arranged in a specific pattern on a bed of sand or grit. The block paving / cobble setts are securely held in position by the neighboring blocks within a mortar-set block perimeter. Block paving presents many advantages compared to alternative paving options, such as its exceptional durability, versatility, and appealing looks.

Table of Contents
1. Paving Design
To start any paving project, its important to have an idea of what you’d like to achieve; create a design that caters to your specific needs. Your design will be determined by whether you are planning to replace or repair your current driveway, and whether you prefer a low-maintenance option or a material that requires regular sealing and upkeep. Additionally, choose a colour and finish for the block paving to suit your overall design requirements.
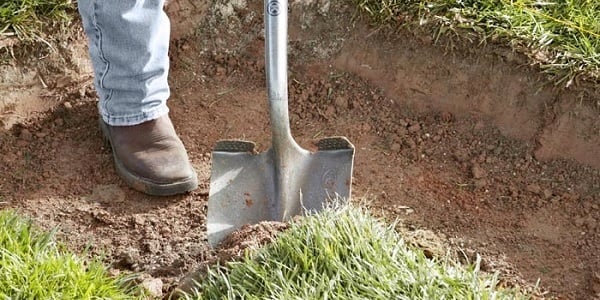
2. Area Excavation
For step two in this how to lay paving blocks guide, carefully outline the area that requires excavation and proceed to dig until reaching the required depth; this required depth will vary depending on the existing surface, but it is important to ensure that the finished driveway is positioned 150mm below the damp proof course of any adjoining buildings. To ensure effective drainage, it will be necessary to create a gentle slope; if the excavated area appears to be flat, it will be necessary to create a slight slope to aid the dispersion of standing water.
3. Edging Border
What do you need:
- Bricks, Kerbs, or Concrete Blocks (Edging Products)
- Cement Mix / Mortar
- String Line & Spirit Level
- Trowel
- Rubber Mallet
How to do it:
You’ll need to create the cement mix and apply to a depth of 100mm. The edging will be placed on top of this at the required level. It’s important to ensure your edging is flat and level using a string line and large spirit level. You can now secure your desired edging in place with mortar, using a trowel and ‘rubber’ mallet to tap the edging into place, ensuring a professional finish.

4. Preparation of the Foundations (Sub-Base)
What do you need:
- Spade or Excavator
- Compactor
- Levelling Tool (Spirit Level)
- MOT Type 1 or Hardcore Material
How to do it:
Use MOT Type 1 as the sub-base material, lay it inside the edging border. You will apply the MOT Type 1 sub-base in layers of 50mm, raking over it as you go, until you have your required level. Now level this off and compact the sub-base thoroughly to at least 100mm thickness, using a compactor or vibrating plate to create a compacted and stable MOT Type 1 foundation.

5) Screeding with Sharp Sand
Step five requires the additional of damp sharp sand, to a depth of 50mm; using the compacting tool / vibrating plate again to compact this material. Once the initial layer of sharp sand is compacted, a final layer of 20mm sharp sand will be applied on top of this, without compacting.
Using the the necessary tools like string lines and screeding rails, this second layer of sharp sand needs to be levelled to the correct falls.

6. Lay Block Paving (Installation)
What do you need:
- Block Paving
- String Lines
- Levelling Tool (Spirit Level)
- Rubber Mallet
How to do it:
Its recommended to begin laying paving blocks from the bottom of the driveway/path slope, starting from a right angle or straight edge is preferable to ensure professional results. Place the blocks along one edge, using string lines for guidance and maintaining consistent joint gaps, tapping into place using a rubber mallet. Continue laying paving blocks up the slope, checking your pattern with the required design as you proceed.
TOP TIP:
Once all the full blocks are down, you’ll need to fill the gaps. This is where its recommended to find a professional landscaper if you have little experience cutting blocks as to fill the gaps, block will need to be cut to the desired size using a diamond disc saw or alternatively, using a basic block splitter; try to avoid cutting a block less than a third of its original size.

Block Paving Installation
7. Finishing Touches (Final Steps)
Once the blocks have been properly arranged following the above step-by-step guide, it is crucial to thoroughly sweep the driveway to remove any unwanted materials to assist with the grouting process, which helps to provide long-term stability and durability.
There is a wide range of jointing compounds and paving grouts available for filling the gaps between your block paving. These products vary in price and possess distinct characteristics that should be taken into consideration when selecting the appropriate block paving grout for your project. We recommend our easy to use, professional grade Flowpoint Fine Rapid Set Flowable Grout thats suitable for all driveway grouting projects, available in a 20KG tub. It only requires the addition of water, making this grouting solution ideal for home DIY projects. Once mixed, spread this grouting slurry into the joints (gaps between slaps) using a sponge or brush and clean off after 30 minutes, ensuring you dont miss any as this can dry and cause unwanted marks on your block paving project.

UltraScape Flowpoint Fine Flowable Grout 20KG
An alternative is our Pointfix Resin Jointing Compound, this doesn’t require water to be mixed and is ready to use straight out the tub. Its ideal for home DIY projects. Simply spread the mixture evenly into the joints (gaps between blocks) using a brush and repeat the process to ensure compacted joints. It’s suitable for all natural stone and concrete block paving, supplied in either a 12KG or 20KG tub with 4 available colours to suit your driveway design requirements; Grey, Charcoal, Mushroom and Buff.

Pointfix Jointing Compound Mortar 12KG/20KG
8. Maintenance
Regular maintenance is essential to preserve the appearance and integrity of your block paving. Sweep the surface regularly to remove debris and keep the joints (gaps between blocks) filled to prevent weed growth, maintain stability and improve the lifespan of your driveway or path. For natural stone, concrete and granite block paving, we recommend our EASYSeal Stone Sealer & Protector. SSP is suitable for external use, helping to seal & protect the block paving.
It’s virtually invisible once applied and allows the stone to “breathe” whilst also protecting paving from all manner of substances including stains, oil spills, moss build up and helps prevent algae/fungal growth.

EASYSeal Stone Sealer & Protector 5 Litres
Driveway Block Paving Tips & Troubleshooting
- Take your time with preparation to ensure a solid foundation.
- Use a rubber mallet for gentle tapping to avoid damaging the blocks.
- Address any issues such as unevenness or gaps between blocks during the laying process.
Additional Related Articles
A Guide To Block Paving Patterns
How To Grout Paving Slabs
FAQs (Frequently Asked Questions)
How do you prepare the ground for block paving?
A common process to prepare the ground for block paving is to initially excavate the area to the required depth. Secondly, determine the edging border and lay the edging blocks. Thirdly, compact the sub-base material, and add a layer of sharp sand or grit for levelling. Once achieved, you are now ready to lay your block paving materials.
Can you lay block paving on just sand?
While sand is commonly used as a bedding material, it’s essential to have a stable sub-base like MOT Type 1 to support the paving blocks and prevent sinking or movement. Please refer to step 4 for further information regarding the sub-base material and step 5 which highlights the use of sand for the block paving projects.
Can I lay block paving myself?
Yes, laying block paving can be a DIY-friendly project with proper planning, preparation, and attention to detail. It’s important to gather knowledge regarding the project before proceeding. However, hiring a professional landscaper is recommended for larger or more complex installations.

Whether your patio is in need of a comprehensive clean or you're just aiming to refresh your outdoor space, this Read more

In all garden designs, steps serve more than just a practical purpose; they enhance the visual appeal of your outdoor Read more

Patio slab painting is becoming increasingly popular, with people painting paving slabs for various reasons, in particular, painting patio concrete Read more

Stopping weeds from growing between block paving is important because they can damage the surface and make the area look Read more