

Overview of How To Install Garden Edging
A lot of homeowners dream of having that perfect garden, that’s neat and tidy and gets a lot of attention from visitors. A clean, defined edge can help to achieve a tidy outdoor space, with neat lines and defined sections. Garden Edging helps to prevent grass/weeds from creeping into unwanted areas, as edging acts as a clear boundary between the lawn and things like flower beds or pathways. Learning how to install a paver edging is a popular DIY project as its affordable if done correctly. This guide will take you through all the steps on how to lay edging stones, so you can easily add that finishing touch to your garden.
Our garden edging is available in a variety of materials:
(Concrete)
(Sandstone)
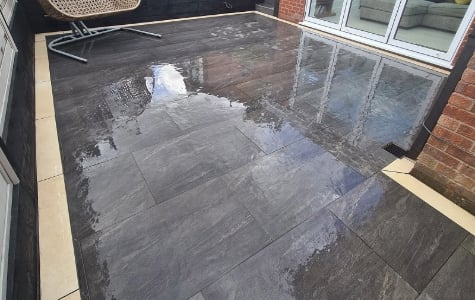
(Porcelain)
Garden edging is further available in different style options:
(Edging Kerbs)
Kerbs are larger than edging blocks, with a more pronounced shape. They’re used along roads, driveways, and paths to separate paved areas from surrounding spaces and often have a vertical face to help control water runoff and provide a stronger barrier. These edging kerbs are usually installed upright, using a concrete base for increase stability.
(Edging Blocks)
These are typically larger, rectangle or square blocks, used to define the boundaries of a paved outdoor space. They offer increased durability and can be used to create borders around patios. Driveways and flower beds. These edging blocks are usually upright, installed using a concrete base for increase stability.
(Edging Strips)
Edging strips are narrow and ideal for subtle or decorative borders around patios, lawns, or flower beds. Smaller than blocks and kerbs, they offer a cleaner, less bulky look while defining the space. They are usually placed flat alongside matching paving to define a clear border.
(Edging Cobbles)
These decorative edging cobbles are small, usually sandstone and used to create edging borders in gardens, driveways, pathways and other outdoor spaces.

Table of Contents
Choosing the right Edging Materials for your Garden Project
Concrete
Concrete Edging is our largest range, budget-friendly options for garden edging; popular options include Concrete Edging Kerbs and Concrete Edging Blocks. Its versatile and available in a variety of colour options to match all design requirements making it easy to find a shade that compliments your gardens style.
Concrete Edging Colour Options:
- Standard Grey
- Dark Grey
- Rustic Red
- Buff / Beige
- Barley
- Welsh Slate
Popular Concrete Edging Products:

Large Concrete Block Edging Kerbs
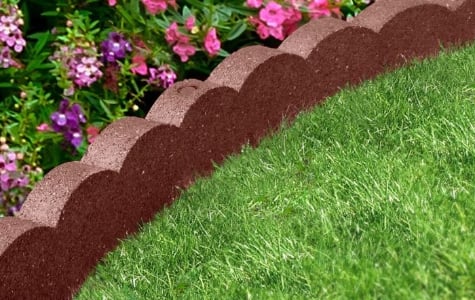
Scalloped Concrete Garden Edging Kerbs
Sandstone
We supply Sandstone Edging as a Decorative Cobble, matching up well with our range Sandstone Paving Slabs.
Its versatile and available in a variety of colour options to match all design requirements making it easy to find a shade that compliments your gardens style.
Sandstone Edging Cobbles Colour Options:
- Grey
- Raj Green
- Mint Ivory
- Fossil Mint
Popular Sandstone Edging Cobbles:
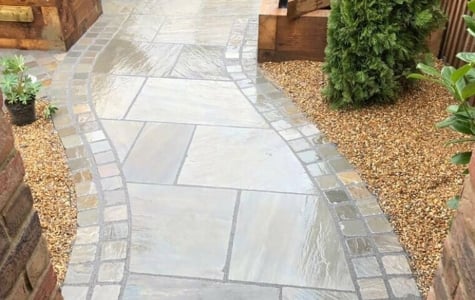
Kandla Grey Sandstone Cobble Setts
Porcelain
Porcelain Edging is our more premium edging option, available as edging strips. This is our more extensive edging range, with a variety of colour options to suit all design requirements.
Porcelain edging strips further compliments our porcelain paving range, allowing you to match the edging strips with your porcelain paved area for a tidy and professional finish that’s modern and eye catching for visitors.
These porcelain edging strips are perfect for a range of landscaping projects, whether you’re using them to complete a patio border or as the focal point of your garden, the choice is yours.
Porcelain Edging Colour Options:
- Grey
- Anthracite Black
- Ivory Beige
Popular Porcelain Edging Strips:
Ivory Beige Porcelain Garden Edging Strips
Preparing your Garden Space for Edging Installation
Its recommended to clear your garden space from dirt and debris before proceeding with the installation of garden edging. For efficiency, collect all your required tools and have these to stored in one place with easy access.
Tools & Materials Checklist
- Wooden Pegs
- Rubber Mallet
- String
- Spirit Level
- Measuring Tape
- Shovel
- Compactor/Tamper
- Concrete (ready-mixed or handmade)
Step-by-Step Guide to Laying Garden Edging (Kerbs & Blocks)
Follow this guide for a professional installation of your garden edging strips, ensuring they remain in place for years to come without shifting.
Step 1: Digging a Trench
- Firstly, mark your desired border line and dig a trench along that line using a garden shovel.
- Ensure the depth of the trench is deep enough to bury the edging halfway.

Digging a Trench
Top Tip: It’s important to have the measurement of the garden edging you’ll be using before you start digging as it will affect the size of the trench.
Step 2: Laying a Concrete Base
- Outline the area where you’ll place your garden edging, using wooden pegs and string to ensure accuracy.
- Dig to the required depth as highlighted in step 1, compacting the bedding area before pouring the concrete.
- Now pour the concrete (ready mixed or hand mixed) to create a 100-150mm concrete base.
Top Tip: We recommend using pre-mixed cement bags for DIY projects as hand-mixing is time consuming.
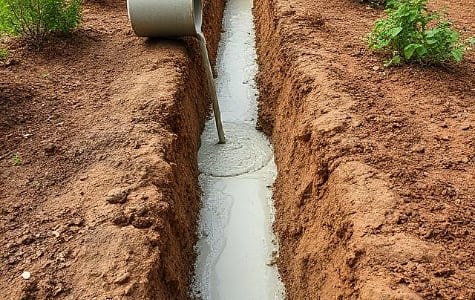
Laying a Concrete Base
Step 3: Place Garden Edging (Kerbs & Blocks)
- Now the concrete base is ready, its now time to place your garden edging blocks and/or kerbs into the position you require.
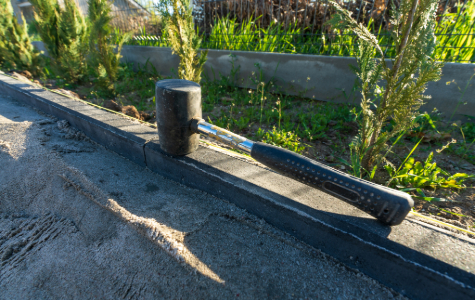
- Once you are satisfied with the placement of your edging, you can begin to gently tap this edging into place using a rubber mallet, being careful not to crack or damage the material.
- As you proceed, if you notice the bedding is too high, simply remove some with a trowel and level it out. If you’re finding yourself having to hit the stone too hard, it’s a good sign that the bedding needs adjusting.
Top Tip: If the stone feels loose after placement, it could mean the bedding isn’t compacted enough. In that case, take the edging out, compact the bedding more, and add extra mix if required.
Place Garden Edging (Kerbs & Blocks)
Step 4: Check The Levelling
- Its vitally important to check the leveling regularly whilst laying garden edging, this leveling process ensures theres no mistakes or anomalies. Once you are satisfied with the edging placement for the first kerb or block, you can use this as a guide for your next kerb and/or block edge.
- To ensure accuracy and efficiency, we recommend using a spirit level to check edging is level and layed correctly.
Top Tip: If one block or kerb is higher than another you can gently push it down further into the bed with the rubber mallet to ensure correct levelling.

Check The Levelling
Step 5: Align and Haunch
- Once you are happy with the placement and alignment of your garden edging blocks or kerbs, you need to haunch them into place to ensure longevity, this further prevents the edging from moving overtime. Depending on the layout, the haunch may go on both sides or just the outer layer, especially if other paving or grass prevents cement on both sides.
- The haunch should be at least 75mm wide to properly support the stone. It’s important to leave about 2.5cm between the highest point of the haunch and the top of the edging kerb or block, unless it covers less than half of the edging.
Top Tip: For the haunch, use a wetter cement mix for a smoother, more stable finish. Further, allow the bedding and haunch to harden before applying pressure, which may take a few days. For example, if you are laying edging alongside a driveway, avoid parking or using the area until the haunch has set in place.
Step-by-Step Guide to Laying Garden Edging (Strips)
Its important to understand the difference between garden edging kerbs/blocks and garden edging strips. Kerbs and blocks are layed upright, where as, edging strips are layed flat alongside other paving for example.
When it comes to a porcelain patio, we have several porcelain edging strip options to choose from, each bringing its own style and functionality. These edging strip options not only elevate the appearance of your patio but also create a neat, defined border.
Follow this guide for a professional installation of your garden edging strips, ensuring they remain in place for years to come without shifting.
Step 1: Site Preparation, Clearing, Marking & Digging
- Once the area is clear, mark the edging strip boundaries. Use wooden stakes and string or rope to outline the shape and size based on your plan. Ensure the strings are taut and level for precise guidance.
- Next, dig the marked area to create space for the sub-base. To determine the depth, measure the thickness of your edging, then add about 10cm for the sub-base, 5cm for the sand layer, and 5cm for the mortar layer.
- While digging, include a slight slope, known as a fall, to ensure proper drainage. A typical slope for patio drainage is about 1 to 2cm of fall per meter of patio length, preventing water from pooling and causing damage.

Site Preparation, Clearing, Marking & Digging (Edging Strips)
Step 2: Lay The Sub-Base

Step 3: Place the Edging Strips
- It’s time to start laying your garden edging strips. Its recommended to slightly wet the back of it, and lay it on the mortar.
- Use your rubber mallet and gently hammer it into place, using the levelling tool to ensure an even surface.

Place the Edging Strips
Top Tip: Installing edging strips follows the same process as installing patio paving.
How to Maintain & Clean Garden Edging
It’s recommended to clean your garden edging each year to maintain its appearance.
For garden edging blocks and kerbs, a common method is to use a pressure washer to remove dirt, moss, and debris that may have built up over time. Before using the pressure washer, it’s a good idea to manually remove any loose dirt by hand. This regular maintenance is important as it will help keep your edging look fresh and prevent the build up of dirt that could cause lasting damage.
For garden edging strips, it’s recommended to apply a sealer that is specifically designed for the material (example: porcelain) to protect and enhance its appearance for years to come. It helps to protect the colour, preventing it from fading overtime. Additionally, it creates a protective layer that increases the longevity of the edging, making it more resistant to weathering, stains, moss build up and more.

Pressure Washing

Apply Sealant To Porcelain Edging Strips
Avoiding Common Errors During Installation of Garden Edging
Improper Planning & Measurements
One of the most common mistakes is not properly planning the layout or measuring the area before installation. Ensure that you carefully measure the space and outline the desired shape of your garden edging. Use stakes and string to mark the boundaries and check for any uneven areas before beginning the installation.
Rushing Soil Preparation
Failing to properly prepare the soil before installing your garden edging can lead to uneven surfaces and instability. Clear the area of weeds, rocks, and debris, and ensure the ground is level. Compact the soil well before laying the edging to provide a stable foundation.
Incorrect Depth & Layering
Another common error is not digging to the correct depth for your edging. Be sure to dig deep enough to accommodate both the edging material and the base layers. Adding the right amount of sub-base material and compacting it properly ensures the edging stays in place and doesn’t shift over time.
Rushing The Drying Time
After laying the edging and applying any necessary mortar or sealant, be sure to allow enough drying time before applying any pressure. Rushing this step could compromise the stability of the edging and affect the overall finish.
Additional Related Articles
How To Lay Patio Slabs
How To Lay Block Paving
How To Build Garden Steps
How To Lay Stepping Stones
FAQs (Frequently Asked Questions)
What is the easiest garden edging to install?
This would be a simple concrete edging kerb, dig a trench to the required depth, pour concrete to create the base and place edging kerbs on top, ensuring they are level using a spirit level for accuracy. Now, proceed to align and haunch the edging kerbs to ensure a professional finish and increased longevity.
What is the cheapest way to edge your garden?
We would recommend researching the installation process and proceeding with the DIY project. Installing block edging kerbs yourself will reduce labour costs dramatically. However, its worth noting that mistakes can cost time and additional materials.
Is garden edging worth it?
Garden edging is definitely worth installing and has many benefits. It helps to prevent grass/weeds from creeping into unwanted areas, as edging acts as a clear boundary between the lawn and things like flower beds or pathways.
How deep should garden edging be?
The depth of garden edging depends on a few factors, including the material you’re using and the purpose of the edging. For lawn edging, its recommended to dig to a depth of around 4 to 6 inches (10 to 15 cm) for the edging to be effective in preventing grass from spreading into garden beds.
As a general rule, ensure the depth of the trench is deep enough to bury the edging halfway.

Whether your patio is in need of a comprehensive clean or you're just aiming to refresh your outdoor space, this Read more

In all garden designs, steps serve more than just a practical purpose; they enhance the visual appeal of your outdoor Read more

Patio slab painting is becoming increasingly popular, with people painting paving slabs for various reasons, in particular, painting patio concrete Read more

Stopping weeds from growing between block paving is important because they can damage the surface and make the area look Read more